

![]()
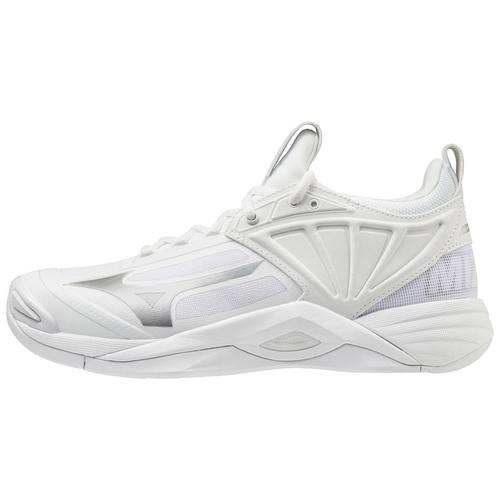
The Mizuno Wave Momentum 2 volleyball shoe features Enerzy Foam cushioning technology that can be a pro and a con. Most will enjoy its bounciness, while some may lament that it’s too unstable. Adding Move insoles can make the Wave Momentum 2 an all around better shoe for long days on the court.
The Mizuno Wave Momentum 2 fits Move Game Day and Game Day Pro insoles true to size. For example, if your shoes are a Women’s Size 10, use the Women’s size 10 or Men’s size 8.5 insole.
The Mizuno Wave Momentum 2 includes no adhesive attaching the stock insole to the shoe’s base. You can use your hands to pull the insole free of the shoe easily. Loosening the laces of the shoe will help make the switch easier. Once you’ve removed the stock insoles, you can slide the Move insoles into the shoes and adjust their position as needed. That’s the process. You'll be ready to play in your Move insoles in 2 minutes.
For a more detailed explanation of removing and replacing the insoles on the Mizuno Wave Momentum 2, please refer to the instructions below.
Mizuno Wave Momentum 2: How to Remove and Replace the Insole
Step 1: Loosen Laces and Remove Current Insole
First, loosen the laces on the shoes as much as possible. This will make it easier to get the tongue out of the way, remove the included insole and insert your new Move insole. The stock insole of the Mizuno Wave Momentum 2 lays atop the shoe’s strobel board, the layer between the insole and the cushioning.
To remove the insole, slightly lift the middle edge of the insole near the arch area. Push your fingers further underneath the insole. Slowly lift the insole. Next, slide your fingers towards the rear of the shoe and fully lift the insole from the heel. Then slide your fingers forward as far as possible. You may not be able to reach the end of the insole due to space constraints inside the shoe. That’s ok. Gently pull the insole free. Remove the insole from the shoe and put it to the side. Repeat the process for the other shoe.
Step 2: Insert your Move Insoles
Now, grab the Move insole that matches the shoe. The left insole's sculpted arch and sawtooth pattern are on the right side. The right insole's sculpted arch and sawtooth pattern are on the left.
Hold the bottom of the insole and ensure your fingers support the more flexible toe area. Starting with the toe area, insert the insole into the shoe and use your hand to guide it towards the inside front. Due to space constraints, you may not be able to guide the insole to the toe of the shoe. Get the end of the insole as close to the toe as possible.
Then, move your hand back along the underside of the insole to the TPU section and push. Stop once the insole touches the inside toe of the shoe. Once the insole is in place, align it with the shoe's base and push down until it settles into place. Slight adjustments may be needed to ensure the insole sits flush with the shoe's base. Once the insole is secure in the first shoe, repeat the process for the second shoe.
Step 3: Checking the Fit
To check the insole’s placement and fit, slide your feet into the shoes, tie them and walk around. If the insole feels slanted or shifted to one side, remove the shoe and readjust the insole’s position.
The fit will feel different. Your foot will sit higher in the Mizuno Wave Momentum 2, have more contact with the upper materials, and feel slightly tighter. That’s normal.
You should also immediately feel the extra cushion and frictionless nature of the Move insole. You’ve upgraded your insole in multiple ways, and your shoes will now have a closer, one-to-one fit.
Tip: If you prefer a looser fit for casual wear (not recommended for basketball), you’ll want to go up in shoe size. Take your Move insoles with you when you try on shoes to ensure the proper fit.
When both insoles are secure, tie your shoes, and head to the court. You’re ready for a new, more comfortable, supportive experience in the Mizuno Wave Momentum 2.
After you’ve had a great experience with Move Insoles, please leave us a review here. Contact customer support here if you experienced any issues you couldn’t fix using the guide above.
Share: